Initial Setup
Note – If this is your first build please take time now to become very familiar with ArduPilot/PX4, Mission Planner/QGroundControl, OpenTX and BLHeli. The more you understand the systems involved the better you will be able to troubleshoot issues as they arrise. And they will arrise. While our goal here is to help people get started, we do not intend to replace the documentation or community support provided by other projects.
In this section of the documents we are going to cover firmware configuration of the devFrame 450 build. We are going to document the process in an order that works for us with lots of links, and a few notes – We are presenting our basic checklist for firmware configuration of the devFrame 450.
What You Need (BOM)
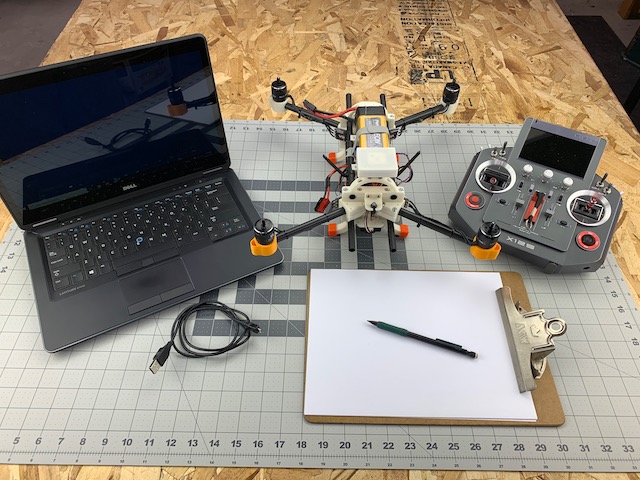
The following should be everything you need to configure the firmware for the flight controller, ESC’s, radio and ground control system (GCS).
Support Equipment
- RC Transmitter running OpenTX
- PC or laptop
- USB to micro USB cable
- Something to take notes
- Internet connection
Software
- Mission Planner or QGroundControl
- BLHeli Suite
GCS Setup
GCS Hardware
A laptop usually works best as you can take it to the field for mission planning and support. In this guide our primary telemetry connection during flight tests will be our FrSky radio, so a laptop is not a requirement for basic use. However, you still need a desktop or laptop to perform initial configuration and post flight adjustments. Detailed hardware requirements can be found in the docs for Mission Planner and QGroundControl, which are linked in the next section.
GCS Software
We will focus on ArduPilot, and therefore Mission Planner in this guide. However, Mission Planner does require Windows OS. If you do not have a PC with Windows then QGroundControl will work fine. You need to install whichever system fits your needs before proceeding. Or install both and see which one you like best.
We also suggest you download and install the latest BLHeli_32 Suite, which we will need to check, update and configure the ESC’s.
Radio Setup
We will be focused on FrSky radios running OpenTX with the Yaapu telemetry script. Initial setup of an RC radio can be overwhelming if you are a first time user. Don’t feel bad. We still have to reference the docs when we need to do most things. The good news is, with support for telemetry on your radio, simple situational awareness for the pilot has taken a huge leap.
Radio Projects
Here are the projects that you need to be familiar with in order to make your radio system work:
- FrSky Downloads Make sure you have at least a digital copy of the manual for your transmitter and receiver. Get familiar with all the buttons and switches. Most of them are eye candy for basic uses but some will be used. And a little muscle memory for reaching the right switch can save an aircraft.
- OpenTX Open source firmware for FrSky and Jumper radios. It can be a bit of work to get it installed and configured. Again, you are not alone. Take your time and understand how the system works.
- Yaapu Telemetry An open source LUA script for telemetry. We now consider it mandatory for all of our builds.
Note - We are using a PixRacer, which includes a port that supports FrSky telemetry without the need for a convertor. There are also more options for telemetry scripts. See this page for more FrSky telemetry options.
Setup Notes
- Here’s an Introduction to using OpenTX with a flight controller. It even goes into custom mixes for advanced flight mode selection.
- Make sure your channel order is AETR, which stands for Aileron, Elevator, Throttle, Rudder and is the order that your RC outputs map to channels 1-4.
- Make sure you have a switch setup for flight modes. You just need one three position switch mapped to channel 5 to start. After that you can go crazy if you like. We rarely need more than three modes from the radio on a given mission, but that is just our preference for trying to keep it simple.
Once you get your GCS and radio setup it’s time to start loading and configuring firmware on the flight controller.